

Hello and welcome to our first blog entry!
This is the one synth I’ve always wanted to own, but it always seemed unobtainable in more ways than one. They’re hardly ever for sale, and when they are, they’re priced accordingly.
History
The SEM (synthesizer expander module) is in my opinion nothing short of a genius concept. It recognized the musicians use of a popular instrument, and sought to add to it’s usability. The story goes that the SEM was born to be the sound of your sequences, and the lead lines were to be played on your minimoog. The only problem was that the SEM was more than just a utility… it sounded incredible, and packed a ton of features in such a small package.
It can’t be overlooked that the sequencer to be paired with the SEM was nothing to glance over either. The Mini Sequencer packed dual 8 step sequencers and were extremely easy to use.
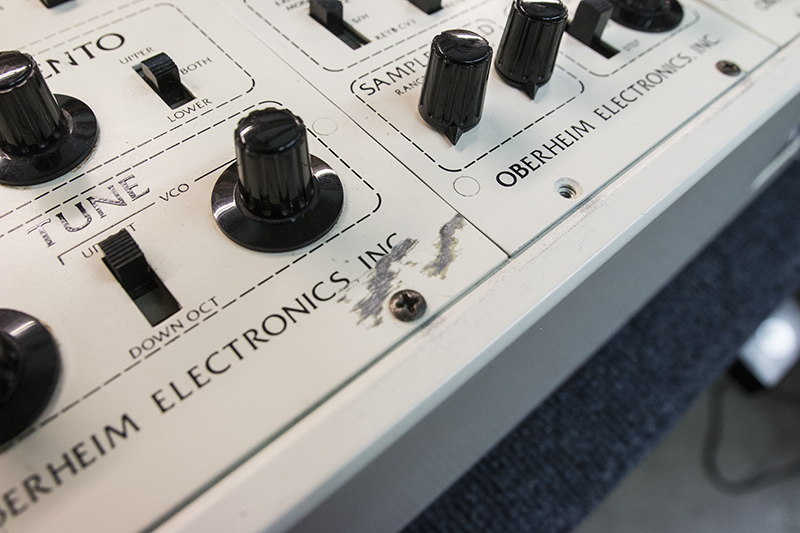
The SEM was inevitably packaged with a keyboard, and thus the Oberheim polyphonic systems were born. These included the two voice, four voice, and 8 voice systems., We associate the two voice today as being the version that houses two SEM’s, a duophonic keyboard, and a mini sequencer in one tolex case, however, the four voice wasn’t too much different when it first came out.
The first four voice systems (FVS) came with two mini sequencers, which allows one sequencer for each SEM for polyphonic chord sequencing. Shortly after, a programmer was added in their place, making the units only marginally easier to tame. Both options however were limiting. On one hand, the programmer adds easier control across all SEM’s, but they’re only offsets, and each SEM can react differently. Worse, when they break, they’re quite difficult to repair! The mini sequencers included with the first units produced un-quantized voltages, which made making a sequence quite difficult.
Though different voice counts, they all worked in a similar way. Polyphonic capabilities were added however each “voice” is it’s own individual synthesizer module. This meant that abstract and evolving chords were created easily, but a consistent sound was quite difficult to adjust. The four voice & eight voice systems were a bit harder to handle, with 8 or 16 oscillators needing to be tuned to one another, it was sure to be a massive sounding headache, and unless you had and can handle the programmer, you can forget about saving your patches.
The first time I played a four voice was after repairing one. I had fixed many two voices at this point, and had no reservations about fixing up a four voice. I treated it as any other SEM based repair, but was completely floored when I had tuned the last SEM and played a chord. It was that moment that I knew I had to have this,
Obtaining
That day was likely never to come until my great friend Ken Rich called me and informed me of a deal that I could take a part in and in turn own a four voice system. I jumped at the opportunity of course! After requesting photos, it turned out this four voice was an early one with two mini sequencers and no programmer. This made it all the better, as I loathe the programmer…. a few weeks later I was in my car heading up to the San Francisco bay to pick up the FVS and some other goodies for Ken.
After getting it into the house I was staying in, I realized I stupidly didn’t bring a oval style IEC with me… now I have to wait days to try it… The suspense hurt, to say the least! I was pleased to see the condition was decent though. The worse I could find was a gash on the poly keyboard module.
First Listen
After getting the FVS and some other keyboard instruments for Ken, I brought them back to Los Angeles and was finally able to test out the four voice. Amazingly, the unit was still more or less in tune, but drifted further and further out as I played away on it’s clunky and desperately in-need-of-a-re-bushing keyboard. As expected from the photos, this four voice had two mini sequencers where you’d normally find the poly programmer. Unknowingly to me, the earliest of mini sequencers produced un-quantized pitch voltages. This means that the pitch can vary infinitely instead of stepping musically every half step while turning the knob. Quantization was standard in later mini sequencers.
Once I removed the sequencers to take a look, I found the serial badge for the unit. I have #00042, which explains the sequencers existence and features (or lack thereof). Making matters slightly worse, 2 LED’s, one on each sequencer, are dead. This is not cool, as replacing one LED will make it obvious it’s a replacement LED, thus, all should be replaced.
Repairs
Finally it was time to dig in. I have some plans to improve this unit but before that, out standing issues need to be taken care of. Here’s the damage report:
– Keybed needs new bushings
– 1 SEM missing oscillator 2
– All knobs are awful, one knob in mixer is locked in place
– Two keys not triggering any SEM’s
– Couple dead LED’s
When Monday morning came, I immediately determined that I was left with two choices:
1. Ignore all of my customers in favor of restoring a personal synth… or
2. Ignoring my personal synth in favor of my customers not breaking my door down.
I went with option 2, however, this didn’t stop me from task’ing my eager-to-learn new hire from getting his feet wet with big boy synths. After all, these are easy to fix if he does something wrong, and I’d rather that be on my own synth than a customers anyway. I first had Eli change the key bushings and clean up the tolex. This was straight forward. The entire keybed was taken apart and the bushings changed. We also removed all of the 4000 series chips from under the keybed and cleaned their sockets. Tolex was cleaned with some 409. We also took this time to cleanup the bus bars and fix the two bent j wires causing those notes not to work.
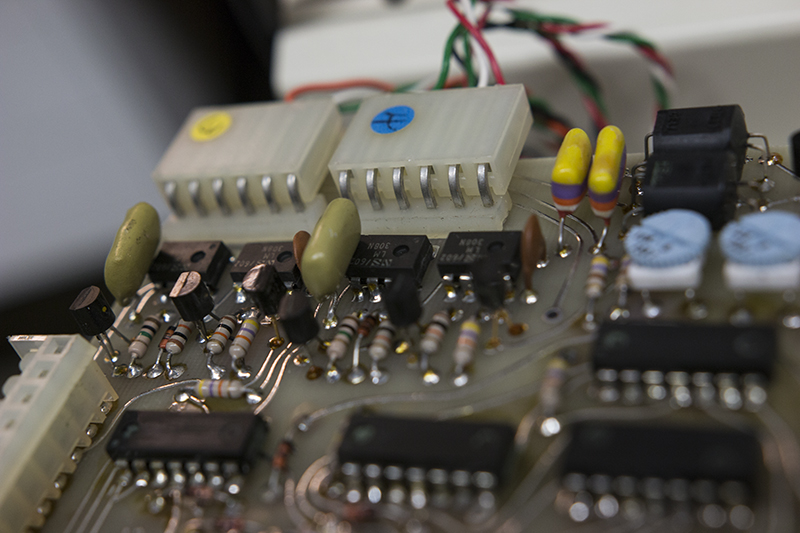
We took out the PSU and changed the large electrolytic’s and swapped out the tantalums with electrolytic. We trimmed it to +/- 18V with new multi turn trims. You’ll notice this is a trending thing around here. 28 turns rather than 1 turn trim pots offers the highest level of stability. A good bump will knock it out, and you’re only as good as your calibrations!
Next, we removed all of the SEM’s, cleaned all the pots, and replaced the tuning trimmers with high quality multi turn trimpots. Originally, the user was expected to trim the scaling control through the front panel with a very long and thin screw driver. This would be fine if the pots were multi turn, but being single turn pots with a wide range, it can be quite annoying to deal with. Just touching it with the trim tool could detune it as much as a major third. With our process, the SEM can be tuned and scaled in the same position quite easily, and doesn’t require much more to bring it tune with one another once theyre all installed in the cage.

After that, we replaced all of the tantalum capacitors with high quality power and audio grade electrolytic type. All SEM’s are firing now, and the second oscillator on SEM 1 is back. We noticed that merely touching the SEM’s face would detune it, and we tracked it down to +15V trims on the units themselves. This made sense, but came as a small surprise. We replaced those trimmers with 28 turns as well.

After some burn in, another issue has arisen. SEM 2 goes up in pitch when a note is pressed and back down when released. We tracked it down to the power section again, and had to replace the transistor associated with the -15 rail.
Next we went to solve the issue of dead LED’s. Instead of putting in vintage red LED’s, we opted to just replace all of them with blue LED’s. Most blue LED’s are blindingly bright, but we found some that were not so bright and defused. They look amazing! I must say though, putting new LED’s in the sequencers was no small feat. In order to change them, all the pots must be removed, which is best left to someone with the right de soldering tools and skills.

Quantization
Now that the unit is fully functional as a stock four voice, i didn’t really take much time to really mess with it, as I knew that the following mods would require some recalibration. Before I could do the finals on this, I had to do this very critical modification.
The lack of quantization on the sequencers was just not going to fly. I discovered later in life that I have untrained absolute pitch, and since it’s realization (and of course before), bad tuning drives me absolutely bonkers. The only question was how the heck am I going to pull it off…
After researching dozens of circuits, it seemed nothing would happen (easily, at least) without the help of a micro controller. Further into research, I discovered a cool euro rack maker called Barton Musical Circuits. I found their kit for the Dual Nice Quantizer and had a good feeling it would be the one. For one, each PCB had two quantizers (hence the name), and it seemed straightforward to put together and gather parts for. I was floored by the price of the PCB’s and ordered the BOM off mouser while I waited for the PCB in the mail.
I had both built in a matter of hours, and just had to figure out the dual rail supply issue. I ended up building a tiny perf board DC regulator board just using some fixed +/- 15v regulators. These were powered off of the four voices +/- 18V regulated supply tapped off of the right side sequencer. They’re very low current, so I am not worried about the power supply being over worked or anything. I mounted these both on the keybed with some JB weld holding down the metal standoffs. Not elegant by any stretch, but better than drilling holes I suppose. I can’t imagine this will be a problem in the future.

Since these things are meant to be put into a euro rack, some slight modifications needed to be made as it’s expecting switching jacks and pots. I emailed the maker, Michael, and he was gracious enough to just tell me which pins to short to what and where to just have a stationary chromatic quantizer. That was easy…. He even emailed me custom calibration procedures. Quite good customer service considering I paid roughly $22 for each PCB including the PIC MCU. Very thankful for their product and can’t recommend it enough for a similar project or your modular system.
Figuring out what traces to cut on the sequencers wasn’t the easiest since there are no available drawings for the original mini sequencer. After the process of elimination, I did figure it out. The problem is that the keyboard CV’s are passed through the sequencers due to the rocker switch, so I couldn’t just take the tap off the output CV wire. The glorious moment was when I calibrated the quantizers and they worked immediately. That’s what I call a win!
I calibrated the SEM’s tuning as normal and tuned the quantizers after. 4 part poly sequencing is out of this world.
More Repairs
Nothing can go right all the time of course, and this thing is no different…
After tuning this and getting to use it for a bit to feel it out and check for more issues, I noticed that the following is now occurring:
- One LED in sequencer one is intermittent
- SEM 1 will not track at all.
- SEM 3 osc 2 is gone
Luckily the issues presented themselves quickly. The bad LED was a almost-shattered resistor on the sequencer. These went through a lot of turbulence for the quantization mod, so not a big surprise there. The other issues however were quite annoying to figure out.
SEM 3 osc 2 came back with a replaced LM301A. Thats nice. It was full rail on output pin.
Solving the tracking issue meant going into the poly keyboard programmer. Making it worse, the poly programmer was patent pending, so all of the integrated circuits have their identifiers scratched off. Ugh. I was able to make an educated guess and check out the op amps near the CV outputs. They were higher quality op amps than the rest of the machine, and I didn’t have one in my drawers. They are the type that can operate at higher voltages. I was able to replace it with an OP07 which I had in my drawers. It worked perfectly and didn’t cause the SEM to need re-trimming.
Finals
And finally it seemed everything was working as it should! I gave it a last tuning and calibrated all of the filters and VCA’s which was no small feat. The sound that this machine can produce is like no other. Four SEM’s firing in harmony can only be described as rich and dreamy. The filter knob on the left hand controller is the only controller you need, and it renders the poly programmer useless in my book.
I am happy to say that even after weeks and weeks of playing, moving it, and burning it in, it has held it’s tunings. The sequencers fire perfectly and the quantization proved to be worth the effort.

And More Problems
And we’re back to repairing….
After a month of burn in and me beginning this blog, it finally failed again. It must have been jealous of the attention my recently acquired Memorymoog and OBX and decided to break itself. 8 notes on the keyboard went out.
I find it strange that the service manual can truly only be understood when you have a peculiar problem with the machine, otherwise it’s really not very intuitive. I was able to track it down to a bad channel on the CD4011 chip on the underside of the keyboard. Now we’re back….
Working
It’s seems almost wrong to say it’s finished, but it’s survived burn in and sounds absolutely incredible. The dream synth finally lives under it’s younger brother, the OB8, and under it’s original counterpart, the Moog Minimoog.
We invite our clients to come to our shop and try out our four voice and other synthesizers. This unit (and many others) are available for rental.